Basic usage
Initializing
Before using HQStage the client needs to be initialized. To do this, please follow the steps outlined here to create a token with the "license read" permission. You will need the token_id and token secret in the initialization step.
To initialize HQStage run
hqstage init
and follow the instructions in the terminal.
Windows ObjectNotFound
Windows ObjectNotFound
If you have not activated your virtual environment Windows will not be aware of hqstage.
Either activate the virtual environment into which HQStage was installed or run
<venv>\Scripts\hqstage
instead of hqstage.
The hqstage init command performs the following steps to set up everything you need to start using HQStage:
- Creation of a configuration file using your HQS Cloud token to authenticate with our software distribution and licensing services.
- Addition of your license ID to the configuration file.
- Activation of your machine for the specified license.
- Checkout of a license file for offline usage, valid for 30 days and automatically renewed when executing HQStage commands.
Installing your first module
Now that everything is set up you can install your first HQStage modules. If you have received the free trial license the HQS Noise App and HQS Qorrelator App modules are available for you. To check which modules are available for your user run
hqstage modules
The output of this command is a table with an overview of your available modules with the following columns:
-
Module Name: The name of the HQStage module in human readable form.
-
Module Key: The unique key of the HQStage module. Use this key to install all packages of the module via
hqstage install <module_key>. -
Packages: The list of packages available for this module. HQStage modules contain one or several python packages. You can install individual packages using
hqstage install <package>
Output
Output
_________________________ _________________________ _________________________
Module Name               Module Key                Packages
_________________________ _________________________ _________________________
HQStage Base              HQSTAGE_BASE              hqstage, hqstyle
HQS Qorrelator App        HQS_QORRELATOR_APP        hqs-qorrelator-app-py
HQS Noise App             HQS_NOISE_APP             hqs-noise-app-py
_________________________ _________________________ _________________________
To install the HQS Noise App and the HQS Qorrelator App into the currently active environment run
hqstage install HQS_QORRELATOR_APP_FREE HQS_NOISE_APP_FREE HQSTAGE_BASE
This will install the HQS Noise App and the HQS Qorrelator App with all open-source dependencies. For more information about the modules' open source dependencies please refer to the modules documentation.
The hqstage install command accepts HQStage module names, e.g., hqstage install "HQS Noise App" and variants thereof, e.g., hqs-noise-app or HQS_NOISE_APP.
Additionally, the command accepts HQS package names, e.g.,hqstage install hqs-noise-app-py or PyPI packages such as hqstage install numpy.
Intel's MKL library is used in some HQStage modules to speed up calculations. To make MKL findable for pacakges in a virtual environment you can add 'mkl' to the hqstage install command,
hqstage install mkl
Hqstage will install Intel's pypi release of the MKL libraries and create required links to libraries in the virtual environment.
Downloading examples and starting a Jupyter notebook server with examples
After installing the HQS Qorrelator App module we want to run our first examples. HQStage modules come with a collection of examples that introduce both underlying physics and software usage. The examples are provided as ready-to-use Jupyter notebooks and can be downloaded using the following command:
hqstage download-examples
This command will download and unpack all available examples for your modules and store them in your user's data directory.
On unix systems this is $HOME/.local/share/HQStage/examples and on Windows $env:LOCALAPPDATA\HQS Quantum Simulations GmbH\HQStage\examples.
To change the download folder use the --download-dir option, e.g., (works on Windows Powershell and unix):
hqstage download-examples --download-dir $HOME/HQS/Examples
The output of the download-examples command will show additional python packages required for the example notebooks and how to install them using HQStage.
Before installing the dependencies make sure the OSS licenses comply with your institution's standards.
To install the dependencies run the printed commands, e.g., on Linux using the default download directory
hqstage install -r $HOME/.local/share/HQStage/examples/hqs-qorrelator-app-examples/requirements.txt
Before launching a Jupyter server to run the examples, jupyter needs to be installed using
hqstage install jupyter
Now, to launch a Jupyter server in the default examples directory execute:
cd $HOME/.local/share/HQStage/examples
python -m jupyter notebook
An interesting example to start with is the NMR_paper_124_trichlorobenzene.ipynb example for the HQS Qorrelator App.
Have fun browsing our examples!
Starting a Jupyter Notebook
This section shows how to run HQStage in a Jupyter Notebook. After installing the HQS Noise App and HQS Qorrelator App modules and learning how to use them by running examples, we want to start a Jupyter server in a new working directory to work on our first own ideas.
First, please create a folder to store your first notebooks like this mkdir $HOME/MyNotebooks and change into the directory with cd $HOME/MyNotebooks. Now, launch a Jupyter server with the installed HQStage modules using
python -m jupyter notebook
This will start a Jupyter server in the active environment and will launch a browser tab connected to the Jupyter server.
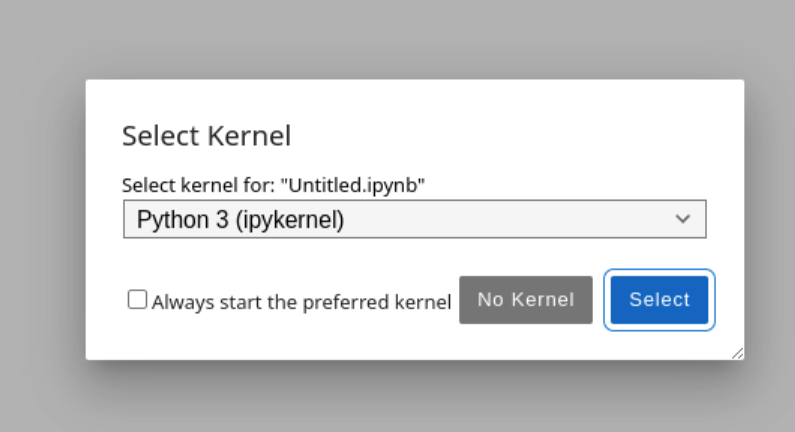
In the browser tab click File-->New-->Notebook to create a new notebook.

In the pop-up asking for a Python kernel select Python 3 (ipykernel).
In the first cell of the notebook enter
import hqs_noise_app
and hit shift-enter.
Congratulations! You have succesfully installed/imported the HQS Noise App.
As a next step you may browse through and try out the example notebooks you downloaded earlier. Enjoy your work with HQStage Modules.